How to Connect OrderPal Ethernet Printer with Your Business WIFI Network
To connect OrderPal ethernet printer with your business WIFI network, you will first need get your computer and Orderpal Ethernet printer on the same network. Please following the below setup steps.
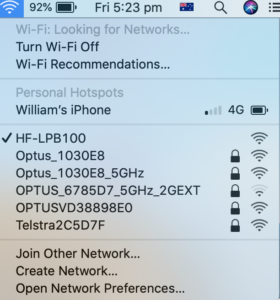
Step 1 – Scan your WIFI network on your computer, you shall find a network called “HF-LPB100”. Connect with “HF-LPB100”
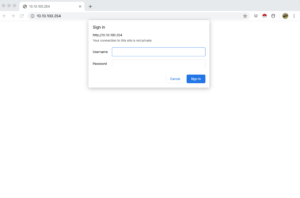
Step 2 – Open your internet explorer enter following IP address 10.10.100.254 at your internet explorer address bar, You can use the below credential to login. Username: admin; Password: admin. When you login in, you can change the language to English by click the language option.
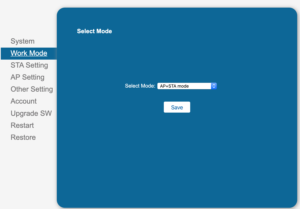
Step 3 – Go to Work Mode, select Work Mode. “AP+STA” and Save
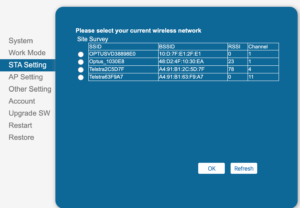
Step 4 – Go to STA Settings, Scan the WIFI network. A list a WIFI networks detected by OrderPal Ethernet printer will be listed. Then select your business WIFI network and then press “OK”.
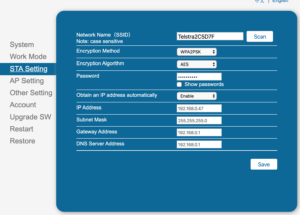
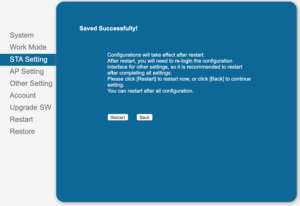
Step 4 – Enter your WIFI network password and then “SAVE”. You will then be asked to re-start the printer. Please do not do re-start at this moment. Please click “BACK”

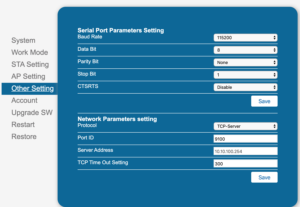
Step 5 – Go to Other settings. Make sure the you “disable” CTSRTS, then “SAVE”.
Step 6 – Re-start the printer by switch on/off the switch power button to restart the printer. It will then connects the printer with your WIFI network automatically.
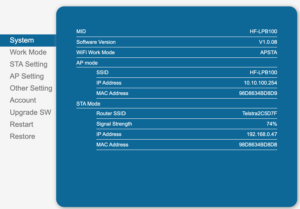
Then you will have to re-connect to the printer and login with IP address 10.10.100.254 to retrieve the IP address of the printer assigned by your network for OrderPal Order Receiving App during printer configuration for OrderPal Ethernet printer. The IP address is under STA mode.